

I used a wooden CD box found at my local craft store (in the painting section)
- I removed the hinge lid to keep just the base of the box. I thought about using the cover to make a drawer, but I just didn't have enough time to make it work.
- I used a saw to make the a rectangle in one of the sides of the box. This is the place where E can retrieve the ball (or form). Make sure that the rectangle you cut out is big enough to enter a hand and get it out with the shape in hand (I almost made it too small!)
- then I nailed (with finishing nails and a nail gun) some narrow wooden sticks (found at the hardware store) just near the upper side of the box. These are necessary to hold the interchangeable lid in place within the box.
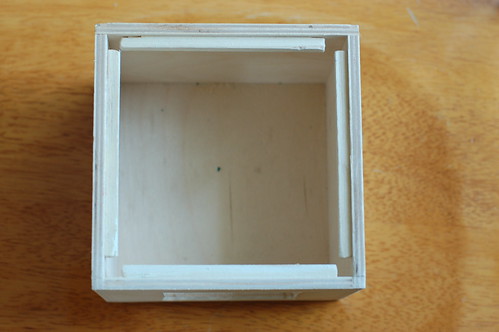
Make sure you leave a space between the wooden sticks and the edge of the box for the cardboard to fit in the box. You don't need a big space, just to cover the thickness of the carboard (so that it lays flat vs the edge):

On one side, I sanded the egde all the way to the wooden stick so that my cut piece of cardboard will be able to slide in and out (this is what will allow me to have an interchangeable lid). I used a rough piece of sandpaper to sand the whole area. I sanded the front of the box, but I could have make this in the back.
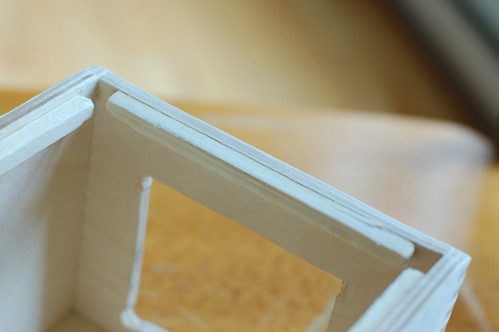
- then I just cut a square piece of cardboard using the dimensions of the inside of the box, using an x-acto and a self healing mat and I also cut out the shape in the cardboard and now my box looked like this after putting this piece on the top of the box:
(It could be used that way, and it was for a couple of days, but since the cardboard lid is not fixed and just put on, I wasn't happy with it. So I managed to find a way to fix it there.)
Using the self healing mat I made a 2 cm large square, using the dimension of the OUTSIDE of the box

and I nailed it over the top of the box:

(note: on this picture, the square is not nailed yet, but it is placed correctly)
THis last piece of cardboard holds the interchangeable lid in place, and soE cannot remove it as he was doing at first. So now he can concentrate in really putting the shape in the hole. the interchangeable piece of cardboard (the one that is under) can slide out in the front of the box: this is the side I had sanded. **Don't forget NOT to nail this side of the box with your square piece!**
I have 2 other shapes ready to be used:

and I am planning on making more lids, with multiple shapes on them
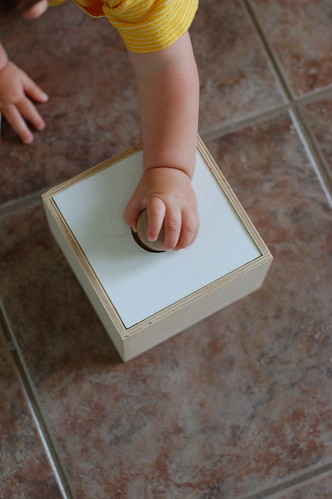
I am super happy with the result and E is over the moon with this activity
This is lovely! Congrats on it coming together and thank you for sharing the how-to with all of us.
ReplyDeleteBrilliant!!
ReplyDeletethank you ladies!
ReplyDelete