
It is the project I had decided to tackle when I embarked on the "Playful learning space" e-course, I guess almost a year from now. I am glad that I did, it really made a difference in the way I parent, and in the way I set up my house.
When I signed up for the e-course, I knew this was the room I'd be working on. And I knew it was a bog project. I took all the time I needed to imagine what I wanted out of this room, to gather the material I needed, and to make it attractive for the children. I tried some things that didn't work, and turned it around until it clicked for everybody. And I am glad I did. Because I often find a little one working there, silently, and completely absorbed in something he/she wishes to do.
The room itself is not perfect. I wish it would be a bit bigger to be able to fit in all the crazy wonderful ideas I had for it. AND don't get me started on the flooring that I HATE with a passion. But I worked with the room I had to make something we'd be able to enjoy together.
And this is the result:
The art section:

this is M 's favorite section. It was hard to organize as I had to keep in mind that I have kids with really different ages, and abilities. So I used wall space to put items I wouldn't want E to use right away, but keeping them available to the oldest.
The IKEA storage under the shelves contains material that all children can use.

On top of it, there are 3 empty containers that usually contain modelling dough, but they have been cleaned this weekend, and are waiting for a fresh batch of coloured dough. E LOVES to play with that, so this is why it is stored at his level.
There is also a wooden plate on top. This is a section I have kept to put pre prepared activities for E. Right now, we has a glue activity that he loves using.
Painting material:
Drawing material:

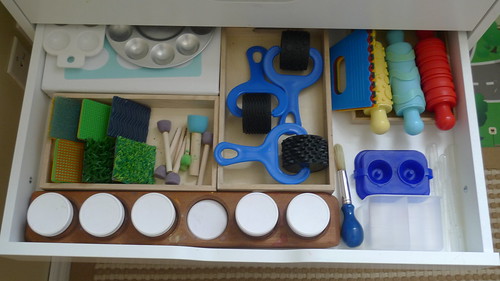
Stamping material:

There is a drawer containing modelling dough accessories, and one containing all sorts of papers to be used. The last one contains material to cut and glue.
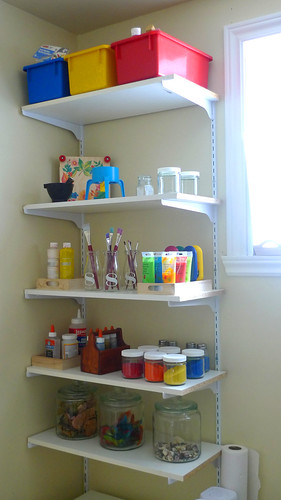
On the last shelve, I have put 3 bins with storage for materials that I don't want the kids to use. It is out of their reach.
I have had a couple of questions already, so using my fellow blogger Kylie's idea, I'll use the labeling method to explain further: (thanks for the idea Kylie!)

On the right side of this shelving, there is the table:

it is a temporary table until we find the right one. Cost us almost nothing to make, and does a wonderful job for now. Right over the table is the art display wall. They can show drawing or other work they have made.
At the left of the art section, I have the activity section:
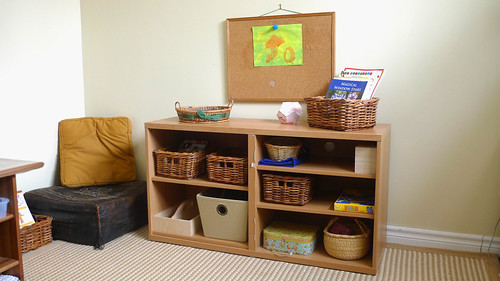
this is the place where I currently store all sorts of activities the kids love doing. THis is X's spot. Most of the baskets contains activities he does. Except the last right lower shelve. THis is a sewing case and a knitting basket that M adores.
I have put a carpet on that side of the room, well partly to hide the floor...(yes, that I hate) but also to be comfy working on the floor. I have left a part of the floor uncovered for all the messy activities the kids do in there. I have to admit that this is it's only advantage: it cleans well, and I do not care one bit if it is stained.
The nook on the left hand side of the photo is a reading spot. I didn't know whether it would work, but it really does. It was a lost space that I didn't know what to make of. But after seeing the children go "hide" in this place many times, I decided to put cushions and a basket of books...the rest is history.
Finally, near the door, I have E's favorite spot:
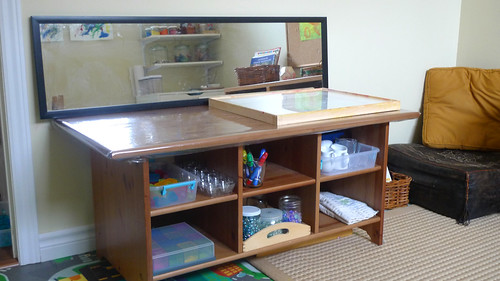
a sensory table of some sort. I used the table we had in the living room before we renovated it.
On the top, there is a light table. There is not one day that passes that E doesn't do in this room to play with the table.

I have stored in the table everything that we use to play with the table: blocs, gems, window crayons, material to pour (which is very VERY popular right now with E). The mirror really entice E to play. I see him looking at himself while he works there. The window crayons are his very favorite thing to play with on the light table.
This concludes the tour. I hope you enjoyed it.
There are so many thing I would have liked to put in there, and I see this as an unfinished product, as I am sure it will evolve (it is constantly evolving) into something else. I am sad not to have more space in there but I rather be grateful to have a space for them to be and do what they want to.
Thanks again Mariah, for the e-course, I really loved it, and it is still very inspiring to me.
Sorry, the photos are not very colorful, it is rather dull outside today, and it has been like that for over a week...
art section
ReplyDeletelooks perfect
!
This space is amazing. I could move right in. It is such a perfect space. I am sure your children could create beautiful things and let their imaginations go free. You have done so well to integrate each child's needs and preferences. Thank you for the labels too. I love to see what is on you shelves! I love the wooden bowls and square boxes in the draws. Lovely.
ReplyDeletelooks absolutely wonderful. you have done an amazing job. the art supplies you have gathered for them are very inspiring and i love how you have set out all the drawers.
ReplyDeletei did playful learning spaces in the second run of it. i loved it too and know what i learnt will stay with me forever.
Can you talk about your light table more?
ReplyDeleteYes, where did you get that light table. It looks great!
ReplyDeletei just found your blog and adore it. ahh, and this room - what a fun place for your children (and you, i'm sure).
ReplyDeleteYes, I'd like more info on the light table! Thanks so much for posting this, it is very helpful and I love all the pictures and information!
ReplyDelete